Figuring out what motherboard you have can be trickier than you’d think. Unlike a graphics card that shows up in Device Manager, the motherboard doesn’t. And let’s be honest, not everyone feels comfortable opening their computer to peek at the circuit board inside.
But there are many reasons you might need this info, from troubleshooting computer woes to planning an upgrade or selling your machine. Luckily, there are ways to find out your motherboard make and model on Windows, macOS, and even Linux, all without needing a screwdriver.
Checking your motherboard on Windows
Finding the details of your motherboard in Windows is pretty straightforward. Just search for “System Information” in the Start menu and launch the app. Once it’s open, look under “System Summary” for three key entries: Baseboard Manufacturer, BaseBoard Product, and Baseboard Version. These tell you everything about your motherboard except for its unique serial number.
Want to find that serial number too? No problem! Just open the command prompt by typing “cmd” in the Start menu search and hit enter. Then, type in this whole command: “wmic baseboard get product,manufacturer,version,serialnumber” and press Enter. This will display all the motherboard info you saw before, plus the serial number you were after.
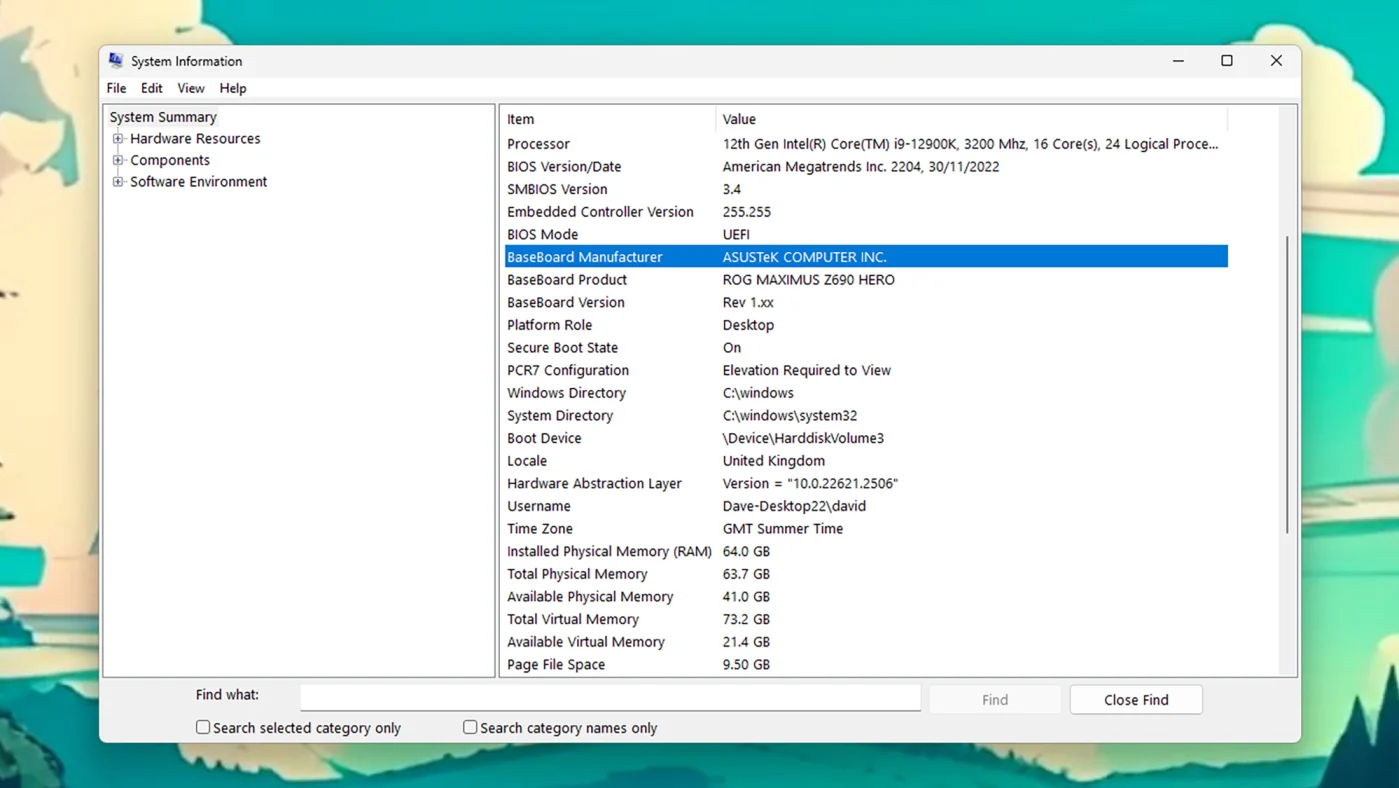
This should give you all the info you need, but there are other options out there too. If you prefer your computer specs presented in a more user-friendly way, there are free third-party tools available.
One popular option is CPU-Z. It goes beyond just the motherboard and dives into details about your memory and processor as well. Another well-regarded tool is HWiNFO (free for personal use). This one not only gives you a detailed breakdown of your motherboard and other components, but it also shows you real-time usage stats for your processor and memory. That way, you can see how your PC is handling your workload.
Checking your motherboard on macOS
On a Mac, the main circuit board is called a logic board, and figuring out its details is a bit trickier these days. But if your Mac is older than April 2021, there’s an easy way.
First, grab your Mac’s serial number. Just head to the Apple menu and choose “About This Mac.” You’ll see the serial number listed along with other info like your RAM and macOS version.
Next step: online detective work! Take that serial number and plug it into a website like the one from PowerbookMedic (a company that fixes Macs). This should unlock a treasure trove of information about your Mac, including the specifics of your logic board.
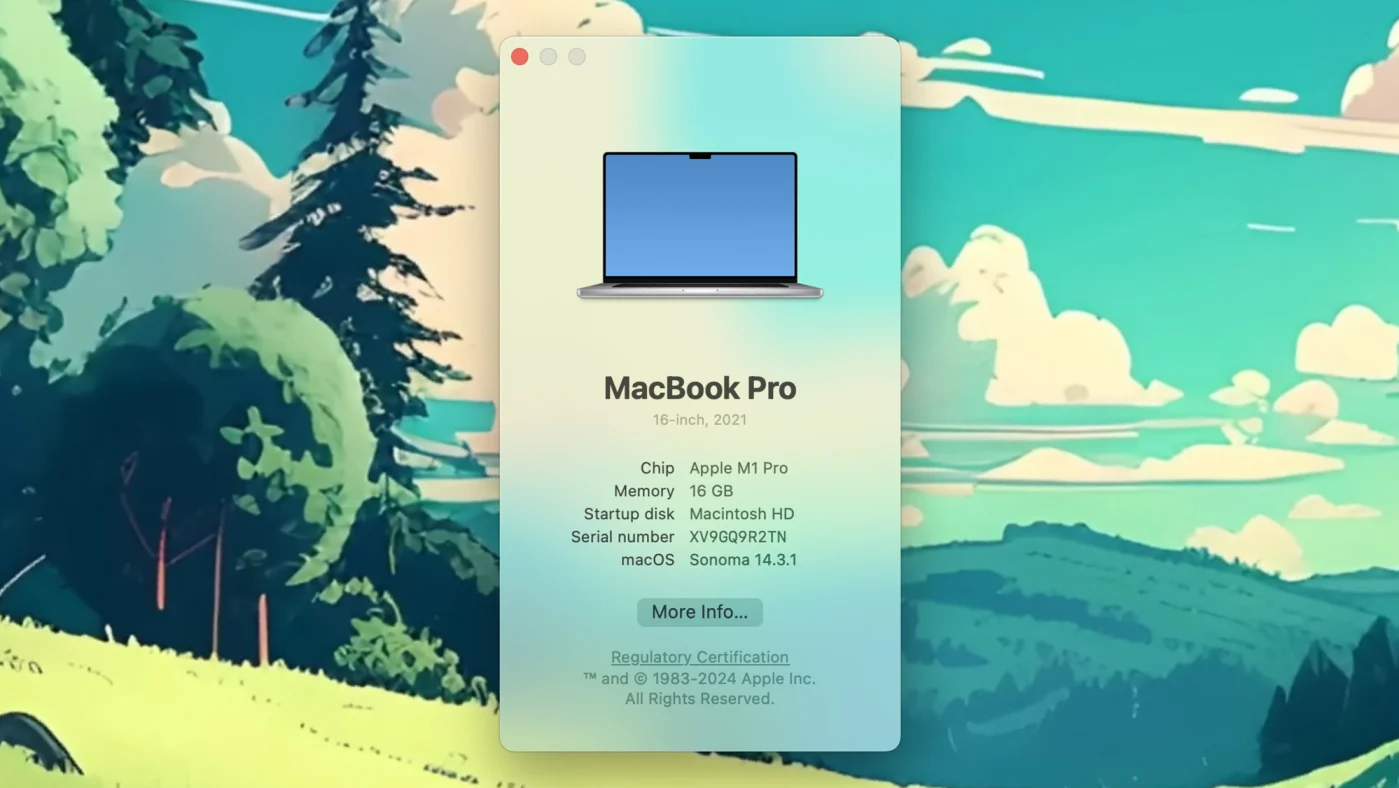
Unfortunately, for Macs newer than April 2021, Apple made things a bit trickier. The serial numbers now hide your Mac’s specifics, including the logic board. But don’t worry, you’re not out of luck!
A website called EveryMac can still be your hero. They can identify most Mac specs using your Model Number, Model Identifier, Order Number, or EMC Number. EveryMac even has handy guides to find these numbers on your Mac itself or in the paperwork that came with it.
Here’s the thing: modern Macs are built differently. The logic board and all its components are basically one big unit. As long as you know your Mac’s model (check “About This Mac”) and the chipset it uses, that info should be enough for most troubleshooting, repairs, or even selling your Mac. If you crave even deeper details about the logic board, websites like iFixit sometimes have detailed teardowns that show you exactly what’s inside.
Checking your motherboard on Linux
Figuring out your motherboard on Linux is pretty simple. Just open a Terminal window (like the program you use to type commands). Then, type this: “sudo dmidecode -t 2” and press Enter. You’ll be prompted for your password, type that in and press Enter again. Voila! This should show you all the info about your motherboard, including the manufacturer, model name, and even the serial number. They call it a “base board” here, but that’s just a technical term.
The command you typed basically retrieves information stored on your computer about its parts. If you’re curious about other components, you can try this command: “sudo dmidecode | more”. This will show you even more details, but one screenful at a time.
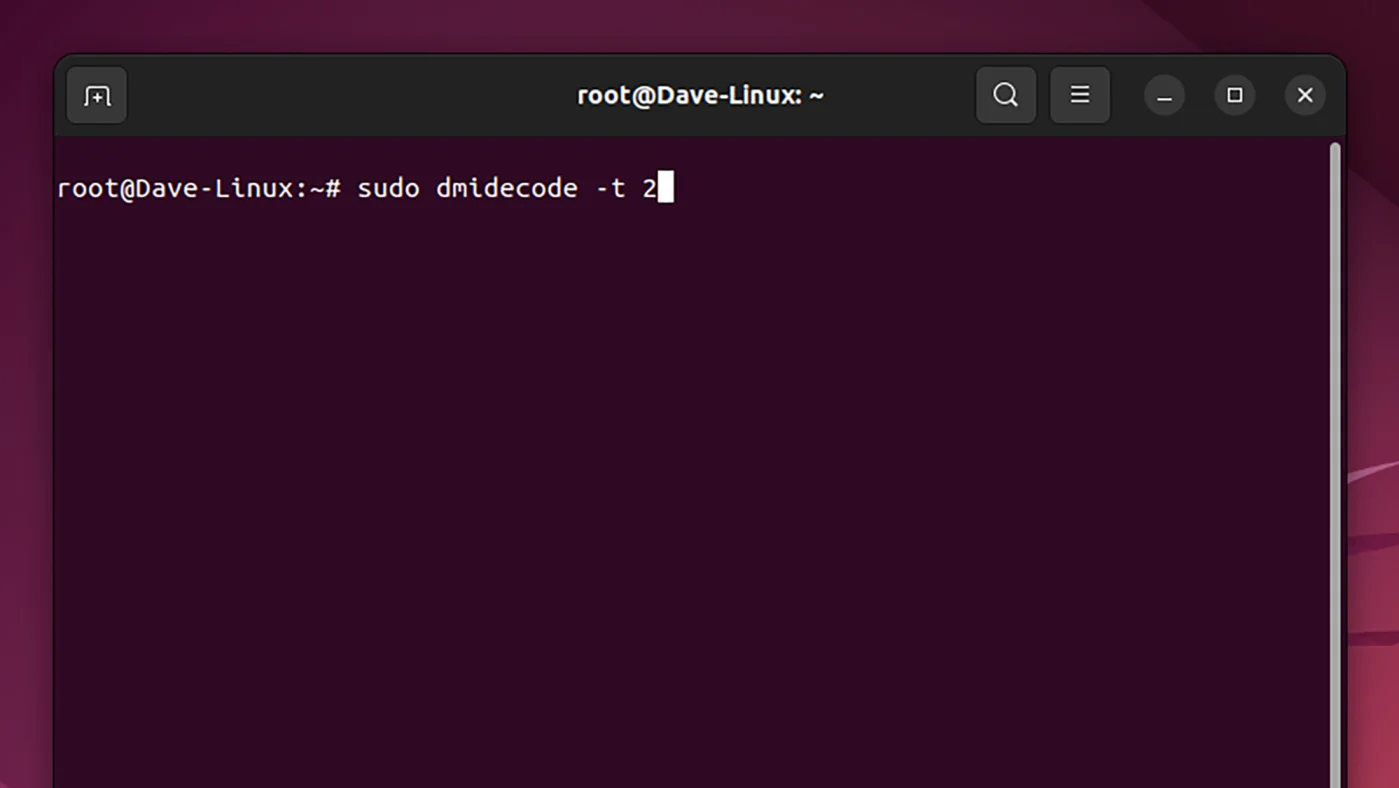
Want to dive deeper into your hardware details? The “lspci” command in the Terminal window can show you all the PCI devices connected to your motherboard. This means you can see things like your processor, graphics card, and even your wireless adapter.
If the Terminal isn’t your cup of tea, don’t worry! There are user-friendly tools available to show you your motherboard specs and other system info. Two popular options for Linux are HardInfo and CPU-G. These tools are like having a system information assistant, all without needing to type cryptic commands.
Checking your motherboard box
If you haven’t gotten your motherboard info yet, there’s one more place to check: the box! This applies whether you bought a pre-built computer or built your own.
For pre-built machines, the motherboard box might have been included with a bunch of extras like spare connectors and manuals. If you built your PC, you definitely have the motherboard box lying around somewhere.
No matter the situation, the motherboard’s brand and model are usually printed clearly on the front of the box. Take a closer look and you might even find details about what kind of processors it can handle. Easy peasy!

This info is especially helpful if you’re building your own PC. You definitely don’t want to buy parts that won’t work with your motherboard! The box should also have the motherboard’s serial number somewhere near the barcode, usually on the back.
And lastly, if you can actually see the motherboard itself (through a window on your case or by opening your PC), you’ll find the brand and model printed right on it, typically near the center. So, if all else fails, crack open that case and take a peek!



Leave a Review